Clones & Clippings
In order to grow cannabis plants through cloning, you must of course, have a mature, healthy plant to start with. Since this process will create a plant that is virtually identical to the one you are cloning, you will want to make sure that it is the type of plant you want to grow.
There are a number of reasons why people want to create clones of their cannabis plants.
- Your previous crop has produced a strain that you are extremely fond of
- You need more seeds and want them to be identical to ones you already have
- You are looking to have a harvest as successful as your last one
If you have ever seeded one of your plants, you will have noticed that the subsequent crop has produced less THC than the mother plant. Cloning is the best way to ensure that you will not be sacrificing THC in your new crop.
In its simplest terms, cloning is just taking a cutting (a piece cut off the original plant) to create an almost identical plant, thus increasing your crop and, of course, your final yield. For example, if you take a cutting from one of your female plants, you will be certain that the new plant will also be female. If you find that your current crop has produced one or two plants that you are particularly fond of for its potency, yield, or perhaps the taste, you can continue to produce these qualities in many future harvests. This does not have to be a complicated process as long as you follow some fundamental guidelines.
While there are a number of varying opinions on the best way to clone cannabis plants, there are some basic steps that apply to any method you decide to choose. The first thing you will want to look at is what you need to begin cloning:
- Decide which plant you want to clone
- Sharp scissors, a scalpel, or razor
- Cloning powder or gel
- Starter cubes (i.e. Rapid Rooters, Rockwool Cubes)
- Low wattage CFL grow light. This should be a specific light designed for seedlings or clones
- Alcohol for disinfecting tools (this should be a high-proof alcohol)
- An optional item would be a mini greenhouse or humidity dome, or a heating mat
Before you begin, you will need to determine if your plant is actually ready to be cloned. Watch for branches on your plant that are alternating as they grow. In other words, look for branches that are not growing on the same place on its stem just as in younger plants. Once you have all the items on your list, you can begin the cloning process as follows:
- Once you have decided on a specific plant, disinfect all your tools. Clean tools and a clean work area are paramount as clones that haven been freshly cut are prone to dirt, bacteria, and microorganisms.
- Carefully follow the instructions of the starter cubes you will be using. Remember to soak them in water before using them.
- If you are using Rockwool cubes, soaking them in water for several minutes will help bring down its higher pH level. You will want it down as far as 4 to 4.5pH.
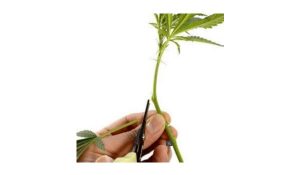
- You are now ready to take a cutting. The ideal spot for this is anywhere there is a new branch with a new top. Cut slightly below the new growth and keep an angel of 45 degrees.
- Each cutting should be from 10 to 20 cm (3.9 – 7.8 inches) long.
- Although you can technically take cuttings from anywhere on your plant, the best place is always new growth from the lower part of the plant. These cuttings tend to root more quickly and are therefore ideal for cloning.
- Put the cutting into a glass of water immediately to help prevent air bubbles entering the stem.
- Remove any big leaves that may be at the bottom of your cutting as well as any larger fan leaves.
- While it is certainly possible to grow clones in just water, rooting aids and other cloning products that contain rooting hormones will help to speed up the rooting process. These can be purchased in gel or powder form. If using these rooting aids, it’s important to immediately dip the bottom of the cutting (where you made the cut) into the gel or powder. This will seal the area of the cut. Remember to read all the instructions on the ‘rooting aid’ before using.
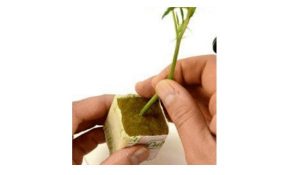
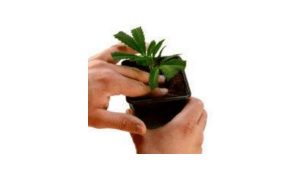
- You can now place your clone into the starter cube that has been pre-moistened.
- Gently press the bottom of the cube to ensure it has a tight seal.


There are a few different mediums one can use to root and grow your clones. Here we will show you the three most common ones:
The Rockwool Method – You can use these helpful visual aids for making clones in Rockwool.
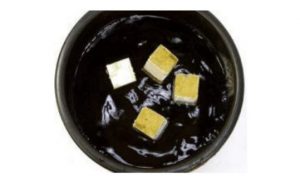
Soak Rockwool in 5.5 pH water

Slant cut the clone

Dip clone in rooting gel
Place it in a Rockwool cube
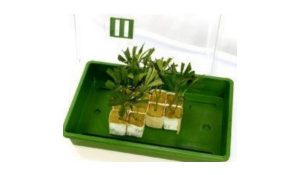
Put them in a propagator
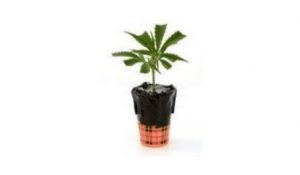
While it is not necessary, a mini greenhouse or humidity dome will be a definite asset in helping to grow your clones. If you are using either one of these, you can now place them inside in order to ensure that moisture will properly surround the clones. Since newly acquired clones haven’t started rooting yet, they need the moisture in the air to thrive and grow.
The Potting Soil Method
Using potting soil for rooting is perhaps the most common and simplest way to root a clone. Always cut away the mature leaves from the stem and immediately dip the bottom (where you sliced the stem) into a rooting powder or gel. You can now stick the plant into the potting soil that has been saturated. Then simply place it under a CFL light and allow the roots to form.

Dip the bottom of your stem into rooting powder or gel
Place the plant into your potting soil then push it down a little
You will now need to nurture your new clones carefully. Remember that clones prefer warm, wet conditions and since their roots haven’t yet formed, they receive their water directly through their leaves. In order to get the roots growing you will need to either mist the plants several times a day or place them in a humid cloner. A heating pad placed under the clones also helps to keep them warm; 22 – 25°C (72-77°F) is ideal. If you plan on purchasing a humid cloner, they are often equipped with automatic heat settings. If using a CFL grow light be sure to give your plants a few hours of darkness each day and remember to watch them closely until they have established a good root system.
The Water Method
Growing roots in plain water is another simple method used in cloning.
- Get a clean plastic bottle that holds about 16 ounces of water. It is best to use a dark bottle as this will help prevent algae from forming. Try to get a bottle with a narrow neck to help hold up your plant.
- Treat the water with plant food
- Remove any mature leaves from the stem
- Place stem into water and be sure to mix every day or two to prevent too much algae from forming as it can clog up the roots
- Keep your clones away from direct sunlight at least until you see new leaves at the top of the plant
New leaf growth typically means that the roots are also growing. Once the roots have formed a nice healthy ball you can start to transplant them.
If you are unable to find a suitable plastic bottle, a cup can also be used. Simply follow the pictures below to start rooting your clone.

Water needs to be 5.8 pH

Cover the top of the cup and make a small hole in the middle

Dip bottom of stem into cloning gel or powder
Place in water
Helpful Tools and Products for Cloning
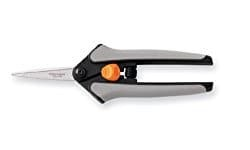
Razor or Scissors
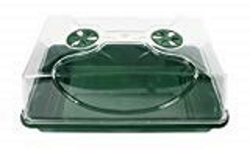
Vented Dome with Tray
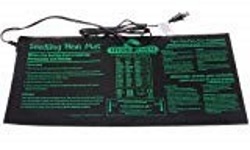
Optional Heating Mat. Ideal for cooler climates
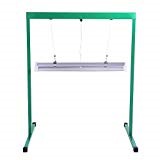
Florescent Grow Light Stand
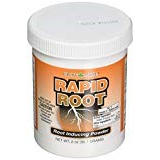
Cloning gel or cloning powder
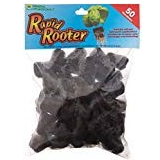
Starter cubes
Cloning is a great way to replicate plants that posses the qualities of your favorite cannabis plants.
If you have chosen to clone one or more of your own cannabis plants, you have already experienced the satisfaction of the planting, growing, and harvesting process. It may have taken some time to become confident in your abilities but even the trials and errors have helped you learn and take pride in the final product.
Cloning is much the same and, for many people, turns into a great passion. Do not be intimated by all the different options or steps in cloning. Simply choose the method that you feel you can best be successful at and begin with that. Enjoy the process and you will soon be confident in your cloning skills.